The step-by-step guide covers installing shade sails, choosing fixing points, checking wall conditions, selecting and installing mounting hardware, and maintaining your shade sail.
When selecting your shade sail, it’s important to consider the correct size shade sail for your space to ensure proper coverage and tension. Make sure to purchase the right size, shape, and design for your needs.
When choosing the material, opt for a UV-resistant fabric for durability and safety outdoors. Reputable companies manufacture shade sails to high standards, ensuring quality and compliance with regulations.
If you plan to use existing structures as mounting points, a tree can be used as a temporary anchor with proper mounting straps to avoid damage.
During planning, ensure there is enough room for proper installation and tensioning of the shade sail.
When selecting hardware and fittings, fixings are readily available from hardware suppliers, making it easy to find what you need. Use the correct fixings for safety and durability.
For secure installation, if you need to install posts, dig post holes to the correct depth and install concrete footings for stability. Proper footing and depth are essential for long-term support.
What are Shade Sails?
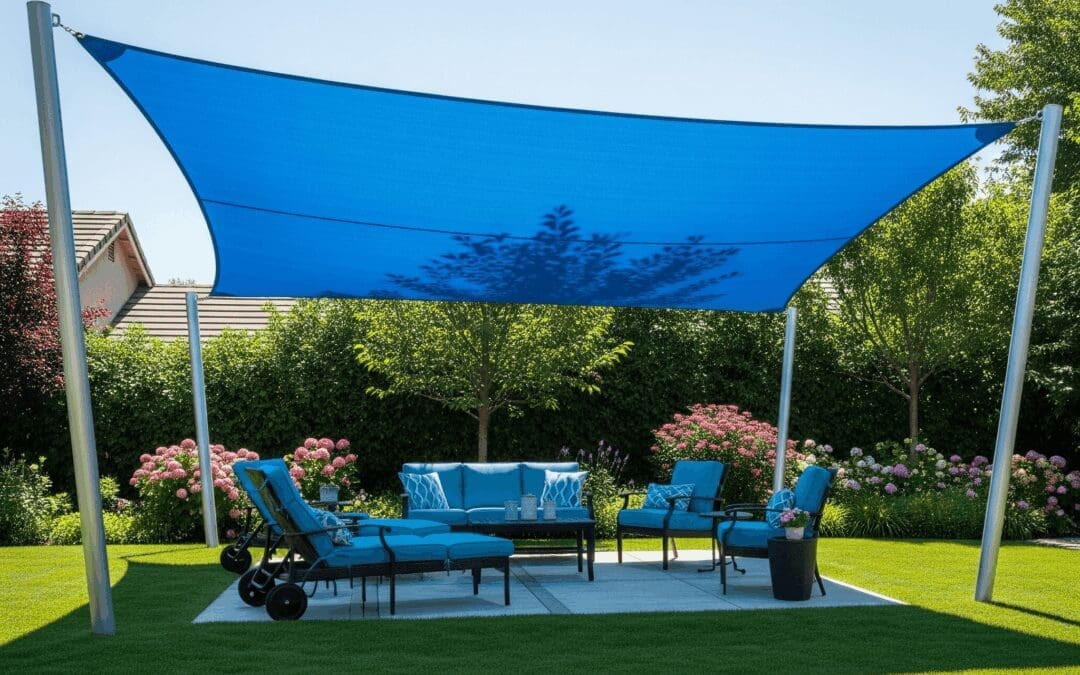
Shade sails are durable, fabric canopies designed to provide shade and protection from the sun’s harmful UV rays in outdoor spaces. They are available in various shapes, sizes, and colours to suit different areas and aesthetic preferences. Made from UV-resistant materials, shade sails offer a cost-effective way to create cooler, more comfortable environments on decks, patios, gardens, or other outdoor areas. Their design allows for airflow, reducing heat buildup while blocking direct sunlight, making them ideal for enhancing outdoor living spaces.
Identifying Suitable Fixing Points on Your House

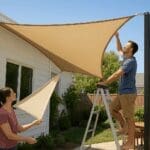
Ready to attach a shade sail to the house? Selecting the appropriate mounting points is key to a successful shade sail installation. The stability and durability of your shade sail depend on these points being strong enough to handle the tension and force exerted by the sail. Locate the fixing points on beams or other structural parts of your house for optimal support.
It’s also important to assess the condition of your house walls. Check for any signs of damage, such as cracks or peeling paint, which may compromise the integrity of the concrete fixing material matter corner post note point points.
Understanding the engineering behind shade sails and the forces acting on them allows you to select the best mounting points and ensure a safe installation.
Check Wall Condition
Look for any visible cracks, moisture damage, or signs of deterioration. Walls in good condition will provide a strong and structurally sound foundation for your shade sail, ensuring that it remains securely in place despite the forces exerted by wind and tension.
Select Mounting Hardware
Selecting the right mounting hardware is vital for a secure installation. Opt for high-quality, durable materials like stainless steel brackets or diamond pad eyes to handle the force exerted by the shade sail. Stainless steel, particularly grade 316, offers excellent resistance to corrosion.
Ensure the mounting plates are made of galvanized or stainless steel to withstand weather elements. Proper spacing and secure installation of the brackets are necessary to accommodate the tension of the shade sail and prevent any potential issues.
When deciding between a 3 point shade sail or a 4 point shade sail, consider the shape and the number of mounting points you will need for your specific space and desired coverage.
Pre Drill Holes
Using a level during this process ensures your mounting brackets are installed straight and even, which is crucial for the overall stability of the shade sail.
Install Brackets and Eyebolts
Tools like an awl and a wrench can help ensure the turnbuckles are properly secured. Additionally, using locknuts on turnbuckles enhances stability and prevents them from loosening over time.
Connecting the Shade Sail

This section covers attaching D-rings and shackles, and using turnbuckles for tension attached.
Attach D-rings and Shackles
Use Turnbuckles for Tension
To achieve the right tension for your shade sail, start by loosening the turnbuckles completely before attaching them to the shackles.
Gradually tighten the turnbuckles to the desired tension, ensuring the shade sail is taut and secure.
Final Adjustments and Maintenance Tips
Regular maintenance is also essential to ensure the longevity of your shade sail.
Tighten and Secure Turnbuckles
After the initial installation, gradually tighten the turnbuckles to achieve the desired tension on the shade sail.
If available, tighten locknuts on the turnbuckles to prevent loosening over time.
Regular Maintenance
Regularly cleaning your large shade sail helps maintain its colour, appearance, and longevity.
Summary
Successful shade sail installation involves selecting structurally sound mounting points, using high-quality shade sail hardware, and ensuring proper tension with turnbuckles. Checking wall conditions and securely installing posts with concrete footings provide stability. Regular maintenance, including tension adjustments and cleaning, extends the sail’s lifespan. Following these steps ensures durable, effective shade and enhances outdoor comfort and protection from the sun’s UV rays.
Frequently Asked Questions
How high should you hang a shade sail?
What type of posts are best for installing a shade sail?
Both treated wooden posts and steel posts can be used. Steel posts are more durable and offer a modern look, while wooden posts are often more affordable and easier to work with. When selecting posts, consider the wall thickness and diameter to ensure they can withstand the forces exerted by the shade sail, especially in windy conditions.
What is the maximum span of a shade sail?
The maximum span of a shade sail depends on its size, shape, fabric strength, and mounting points. Generally, spans up to 5 to 6 meters are common, but larger sails require stronger posts and secure fixings to maintain proper tension and stability.